
How to Set Up Your Greenhouse for Maximum Growing Space
Disclosure: As an Amazon Associate I earn from qualifying purchases. This post may contain affiliate links, which means I may earn a small commission if you click through and make a purchase – at no extra cost to you.
A greenhouse is more than a shelter for plants. It is a small, steady climate you can shape with light, airflow, warmth, and water. When the inside works well, you get earlier seedlings, longer harvests, and a calmer gardening rhythm. This guide walks you through how to set up a greenhouse for maximum growing space. We will plan the layout, choose smart tools, keep it tidy, manage climate and irrigation, and stretch the season in both directions. Think practical, pretty, and productive.
Start With a Smart Layout
Measure first, then map. Sketch the footprint on paper. Mark doors, the highest sun side, and any shade from buildings or trees. Note where water and power enter. This ten-minute map saves hours later.
Use the rule of clear aisles and reachable benches.
- Keep one main aisle 24–30 in wide so you can move a cart or watering can without brushing plants.
- Side aisles can be 18–24 in.
- Benches or raised beds should be 24–30 in deep so you can reach the center from one side. Anything deeper is hard to maintain.
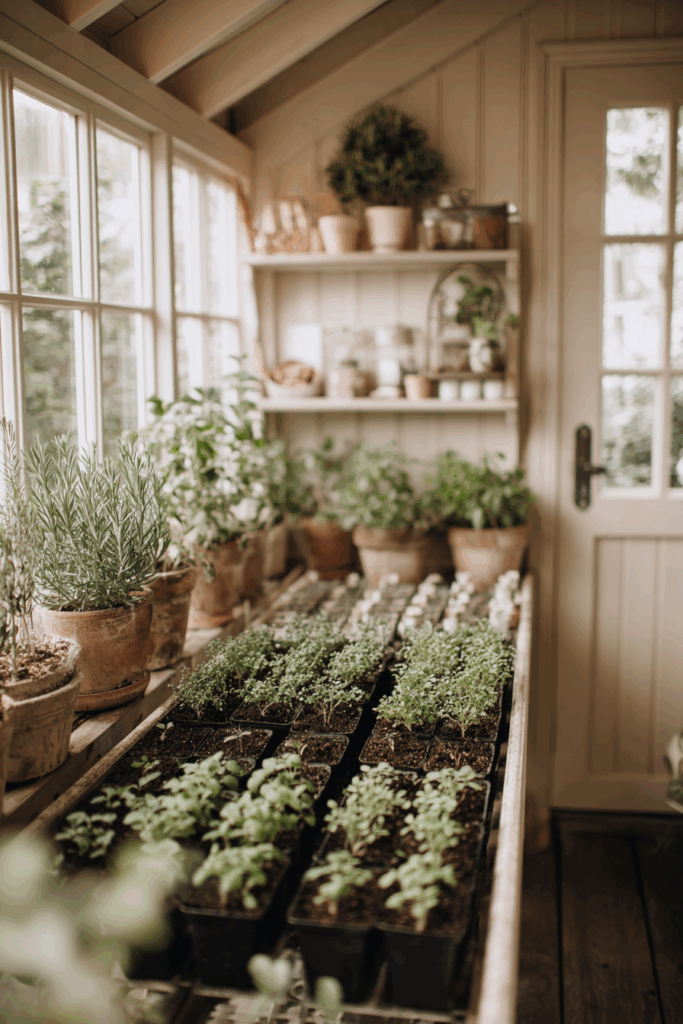
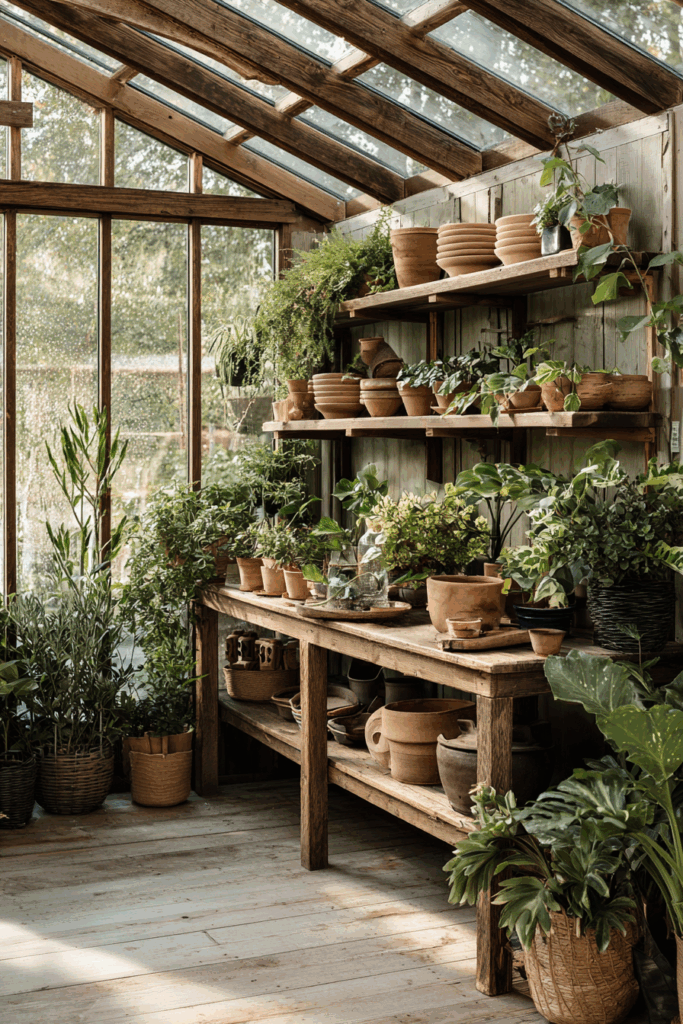
Stage or bed. Benches are great for seed trays, herbs, and compact crops. Ground beds or low raised beds are best for tomatoes, cucumbers, peppers, and roots. Most home greenhouses do well with benches on one side and a long soil bed on the other.
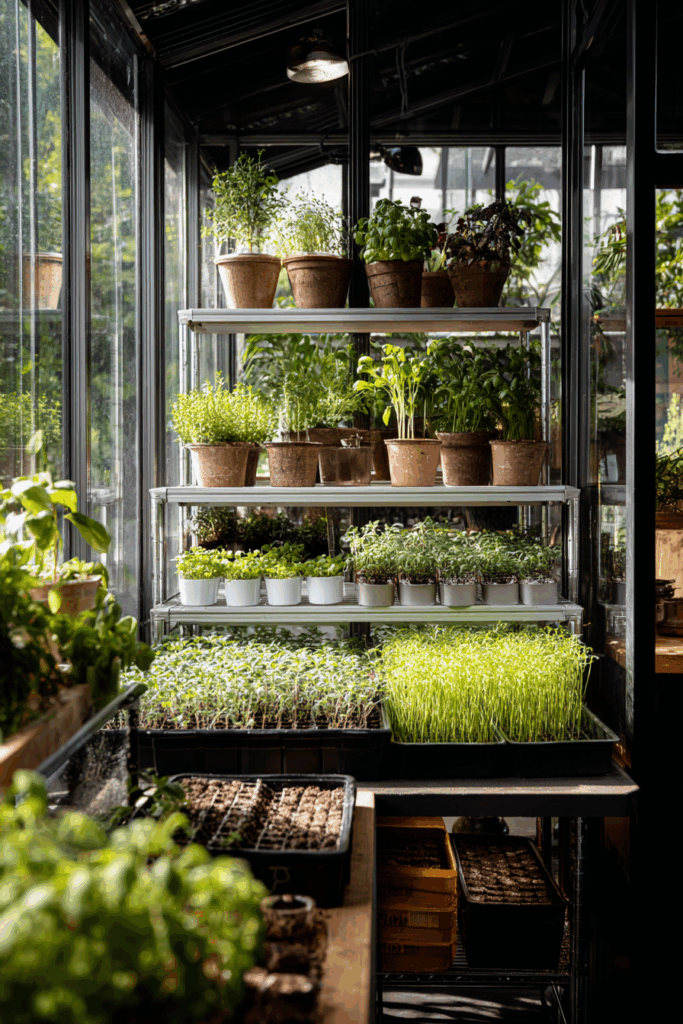
Grow up, not out. Add vertical supports along the ridge and end walls. Use J-hooks, crossbars, or simple eye screws to hang baskets, string trellises, and clip LED shop lights for seed starting. A single top rail can hold ten or more hanging pots without stealing floor space.
Group by needs. Place thirsty crops near irrigation lines, heat lovers along the warm south or west side, and cool greens near vents. Keeping similar plants together simplifies watering and pest checks.
Door and path planning. Leave a small landing zone inside the door for a hose reel or a boot tray. If your greenhouse sits on gravel, lay pavers or a rubber mat down the center. Dry footing keeps you from compacting soil and slipping.
Quick layout templates
- 6 × 8 ft: 24 in bench on left, 18 in aisle, 30 in soil bed on right, small potting shelf across the back.
- 8 × 12 ft: 30 in bench left, 24 in aisle, 36 in raised bed right, narrow seed shelf across the back with a fan hung above.
- 10 × 14 ft: benches on both long sides, 30 in aisle, short raised bed at back with a fold-down potting table.
Orientation tip. In most temperate regions, a long side facing east-west captures steady light through the day. If your site gets intense summer sun, plan for shade cloth on the south or west exposure.
Power and water lanes. Run a GFCI outlet and a hose line along one side, not across the floor. Zip-tie cords up under shelves to keep pathways clean.
Choose Tools and Accessories Wisely
Daily basics that earn their space
- Hand trowel, snips, pruners, and a stiff brush for benches.
- Narrow-spout watering can for seedlings and a coiled hose with a shut-off for beds.
- Seed trays, 1020 flats, humidity domes, plant labels, and a waterproof marker.
- A sturdy potting bench at hip height. Add a lidded bin under it for potting mix.
- Digital thermometer and hygrometer. Place one at bench level and one up high to see temperature pockets.
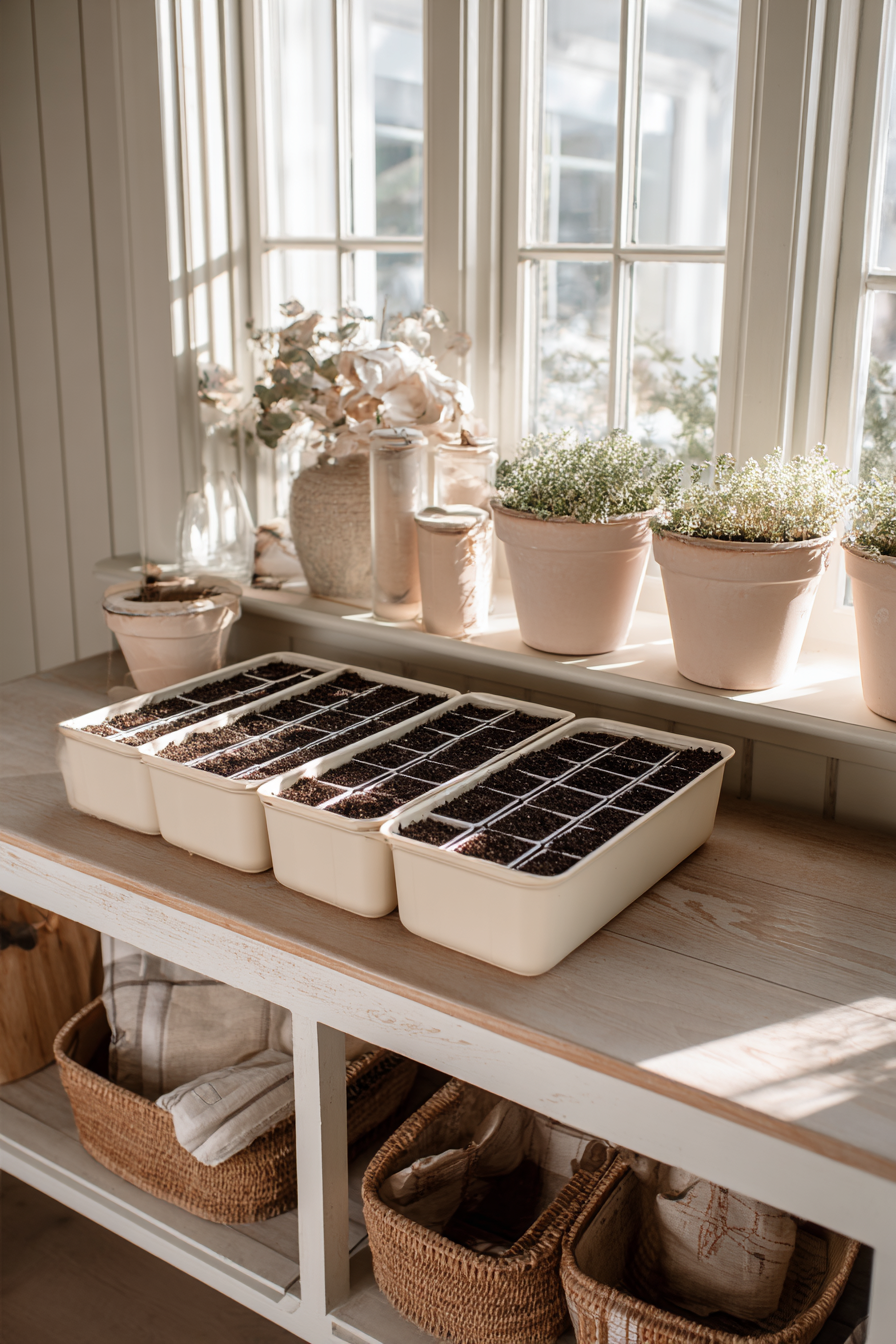
Seed starting extras that matter
- Heat mat with a thermostat for fast, even germination.
- Full-spectrum LED shop lights at 4–6 in above the canopy for strong starts.
- Capillary mats under trays to keep moisture steady.
Support and training kit
- Soft plant ties, tomato clips, and reusable trellis netting.
- Bamboo canes or string lines from the ridge for cucumbers and tomatoes.
Climate helpers
- Small clip-on circulation fans to prevent disease and strengthen stems.
- A portable space heater with a tip-over switch for cold snaps.
- Automatic roof-vent openers that lift when it gets warm and close again as it cools.
Water wise add-ons
- Inline filter on your hose to protect emitters and misting nozzles.
- Simple timer for drip lines so morning watering is consistent even when you are busy.
- Rain barrel with a screened lid and a first-flush diverter if you harvest roof water.
Good, better, best suggestions
Best: roof-vent opener, two clip fans, drip irrigation on a timer, and a heat source set to a safe minimum.
Good: manual watering and a small fan.
Better: add heat mats, a clip fan, and a cheap LED light for seed trays.
Ventilation and Climate Control
Healthy plants live in moving air at steady temperatures. Stale, still air leads to mildew and stressed growth.
Layer your airflow
- Roof or wall vents let heat escape at the highest point.
- Side vents or a louver at the base pull in fresh air.
- Two small circulation fans keep air moving along benches and prevent hot corners. Point fans across the house, not directly at leaves.
Shade and cooling
- Install 30 to 50 percent shade cloth for summer. Pull it over the roof on hot days to cut leaf scorch and reduce watering.
- In dry climates, a small evaporative cooler can bring temperatures down in the afternoon.
Holding winter heat
- Close gaps with weatherstripping.
- Add thermal mass such as dark water barrels along the north wall. They absorb warmth by day and release it slowly at night.
- Use a frost blanket at night over tender crops. Remove in the morning to keep growth compact and healthy.
Safety with power
Use outdoor-rated extension cords only, plug into a GFCI outlet, and keep cords off the floor. Water and electricity do not mix.
Keep It Tidy and Efficient
Clutter steals space and invites pests. A simple system keeps the whole house calm.
Set up zones
- Clean zone: potting bench, soil bin with a scoop, label drawer, and hand tool hooks.
- Growing zone: benches and beds only. No extra bags or boxes under plants.
- Quarantine corner: a small side shelf for any new or stressed plant. Watch it for a week before moving it in with the rest.
Weekly quick clean
- Sweep paths, brush off benches, and empty drip trays.
- Wipe shears with alcohol and rinse watering cans.
- Check for condensation on walls in cool weather. Dry wet wood to prevent mold.
Pest-smart routine
- Hang yellow sticky cards near vents to monitor incoming pests.
- Look under leaves every few days for tiny webs or stippling. Early action is easy.
- Keep a gentle spray on hand. A mix of insecticidal soap or neem works for most soft-bodied pests. Always test on a leaf first.
Record keeping that pays off
Keep a small notebook or use your phone. Log sowing dates, germination times, harvests, and any problems. Patterns appear fast and help you plan the next round.
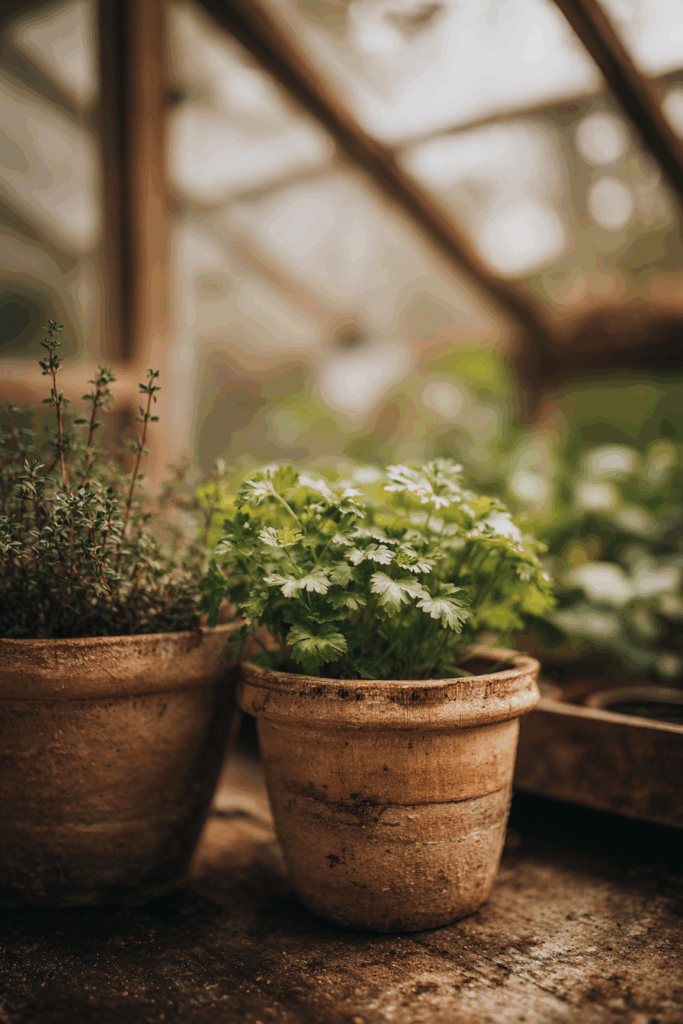
Soil, Beds, and Container Setup
Great plants start with great media. Most greenhouse crops prefer a light, airy mix that holds moisture without staying soggy.
Raised beds or ground beds
- Line the base with cardboard to suppress weeds.
- Fill with a blend of compost, screened topsoil, and coconut coir or peat-free mix for water holding.
- Refresh with two inches of compost between plantings.
Container strategy
- Use breathable fabric pots or plastic pots with several side holes.
- A reliable all-purpose mix: two parts high-quality potting soil, one part compost, one part perlite or pumice.
- Feed lightly every two weeks once seedlings are established. A dilute seaweed or fish emulsion works well.
Simple crop rotation
Alternate fruiting crops like tomatoes with leafy greens or roots. This balances nutrients and reduces disease buildup.
Sanitation
Soak reused pots in a 10 percent bleach solution or use a hydrogen peroxide product. Rinse and dry before planting again.
Water Management and Irrigation
Consistent moisture is the quiet secret of a productive greenhouse.
Choose a method
- Drip lines along beds for tomatoes, peppers, and cukes.
- Micro sprayers above greens for quick germination.
- Capillary mats under trays for seedlings that prefer bottom watering.
How much and when
Water in the morning so leaves dry by evening. Check pots by weight or stick a finger an inch down. If it feels barely moist, water. Aim for deep, less-frequent watering on fruiting crops and steady, light moisture for seedlings.
Rainwater and filtration
If you collect rainwater, screen the barrel to keep mosquitoes out and run a small filter before drip lines. Store barrels out of direct sun to reduce algae.
Maximize Seasonal Growing
A greenhouse stretches your season on both ends. Plan small, steady waves of crops.

Cool season plan
- Late winter and early spring: spinach, lettuce, arugula, Asian greens, peas, radishes, and early herbs like parsley and chives.
- Use heat mats and lights for tomatoes and peppers indoors while greens fill the beds.
Transition plan
- As nights warm, transplant tomatoes, cucumbers, peppers, and basil to the soil bed.
- Tuck lettuce under tomato trellises where it enjoys dappled shade for a few more weeks.
Summer management
- Pull shade cloth, open vents early, and use fans all day.
- Pick fruit often to keep plants producing. Remove lower tomato leaves for better airflow.
Fall and winter plan
- Replant with spinach, kale, Swiss chard, cilantro, and carrots.
- Add a lightweight frost cover at night when temperatures drop. With a small heater set to a safe minimum, you can pick greens through most winters in many climates.
Pollination note
Tomatoes and peppers self-pollinate with a little movement. Tap the support string at midday or run a fan nearby. For cucumbers, choose parthenocarpic varieties that set fruit without bees when doors are closed.
Simple Automation That Saves Time
A few small devices keep plants happy when life gets busy.
- Plug fans and heaters into smart plugs so you can check them from your phone.
- Run lights and heat mats on outlet timers.
- Use a temperature alert that pings you if the house dips below a set point during a cold snap.
- Set drip irrigation to water at sunrise three days a week, then adjust as the season changes.
Sample Year-Round Planting Plan for a 6 × 8 ft Greenhouse
February to March
Start tomatoes, peppers, basil, and flowers under lights. Plant trays of lettuce, spinach, and radishes for cutting.
April to May
Transplant tomatoes and cucumbers into the long bed with string trellises. Keep a bench full of herbs and salad trays.
June to August
Harvest cucumbers and tomatoes twice a week. Sow basil and cilantro every three weeks. Vent early, add shade cloth, and keep a fan on low.
September to October
Remove summer vines. Add compost. Plant kale, chard, carrots, and Asian greens.
November to January
Harvest leaves a few times a week. Close vents at dusk and use a frost cover on very cold nights. Start onions or early flowers indoors.
Final Thoughts
A well-equipped greenhouse does not rely on fancy gadgets. It runs on good layout, clear aisles, healthy soil, and small habits that keep air moving and water steady. Start with what you have, build one smart upgrade at a time, and let your greenhouse teach you the rest. The result is a calm working space filled with fresh food, flowers, and that quiet joy of watching green things thrive.
You’ll also love
FAQ
A small 6×8 ft greenhouse is perfect for starting out. Compact yet roomy enough for herbs, vegetables, and flowers.
Use a small space heater, thermal mass (like water barrels), or insulating bubble wrap to maintain stable temperatures.
Hand trowel, pruners, watering can, thermometer, and seed trays are essential for daily tasks.
Keep surfaces clean, check plants regularly, and use insect netting or natural pest deterrents.
Cool season greens are happy at 40-45°F at night with a light cover. Fruit crops prefer a steadier 55-60°F.
As a rough guide, a well-sealed 6 × 8 ft greenhouse often does well with a small portable unit on a thermostat for cold snaps. Always choose models with a tip-over switch and keep them away from plastics and fabrics.
For spring seedlings, yes. Short days and cloudy weeks cause stretching. Full-spectrum LED shop lights hung close to trays make sturdy starts.
It is usually a mix of low airflow and high humidity. Increase ventilation, thin dense foliage, and run a small fan to keep air moving.

